キャンピングカーに搭載したい装備として憧れていた水回りや調理テーブル(通称ギャレー)。
ギャレーが標準搭載されている車種も選択肢にあがっていたが、値が張ることに加えて据え付け型のギャレー搭載車は就寝スペースが犠牲になっている点がネックであった。ギャレー未装備車である我が車に簡易シンクを追加工できないか、購入時に実は相談もしたのだが据え付けとなるとどうしても配置に無理があり断念している。
そこで積載が自由な簡易的なポータブル給排水ギャレーをDIYで自作することにしたのだ。
ギャレーが標準搭載されている車種も選択肢にあがっていたが、値が張ることに加えて据え付け型のギャレー搭載車は就寝スペースが犠牲になっている点がネックであった。ギャレー未装備車である我が車に簡易シンクを追加工できないか、購入時に実は相談もしたのだが据え付けとなるとどうしても配置に無理があり断念している。
そこで積載が自由な簡易的なポータブル給排水ギャレーをDIYで自作することにしたのだ。
A water sink and cooking table... a galley was something I wanted to equip my camping car with.
Some camper models equipped with a galley were candidates in my search, but were filtered out due to not only budget reasons but lack of sleeping space due to the permanent galley unit. I actually consulted my dealer about adding a simple water sink in my NV200 Camper FOCS Luz but gave up on it since it just didn't work.
As result, I decided I'd DIY a portable water sink system that can be carried on and off the car.
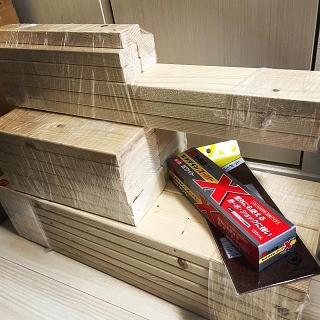
まずは部品集め。
一枚板の組み合わせで作り上げた方がキレイな仕上がりになるそうであったが、作りながら高さの調整ができるようにと1x4と2x4の木板を積み上げていく方法をチョイス。これも味があってい良しとした。シンクと給排水用のポリタンク、USB充電式の給水ポンプなどの備品を揃えた。
一枚板の組み合わせで作り上げた方がキレイな仕上がりになるそうであったが、作りながら高さの調整ができるようにと1x4と2x4の木板を積み上げていく方法をチョイス。これも味があってい良しとした。シンクと給排水用のポリタンク、USB充電式の給水ポンプなどの備品を揃えた。
Starting off with collection of parts and materials.
The wood parts of choice was 1x4 and 2x4 lumber so I can make adjustments to height as the frame built up. One piece boards may have looked prettier, but 1x's and 2x's have it's tastes too. The sink, supply and waste water tanks, and a USB charged electrical water pump were other parts that were collected.
The wood parts of choice was 1x4 and 2x4 lumber so I can make adjustments to height as the frame built up. One piece boards may have looked prettier, but 1x's and 2x's have it's tastes too. The sink, supply and waste water tanks, and a USB charged electrical water pump were other parts that were collected.
- ミニシンクセット ステンレス(320mm×265mm×H100mm)
- ポリタン10L ポンプキャップセット(131011)
- アズワン スクエアーボトル 5L / 4-5331-02 (今回は非採用)
- Atyhao 飲料水ポンプ 電動 ウォーターポンプ USBケーブル付き 飲料水ポンプ 吸水ポンプ 電動 ウォーターポンプ
- Rebornsun 飲料水ポンプ 電動 ウォーターポンプ USB充電式 ウォーターサーバー ディスペンサー おりたたみ コンパクト 簡単操作 (今回は非採用)
- uxcell シリコーンチューブ エアホース 水パイプ シリコーンラバー製 クリア 5 mmx7 mm 長さ1 M
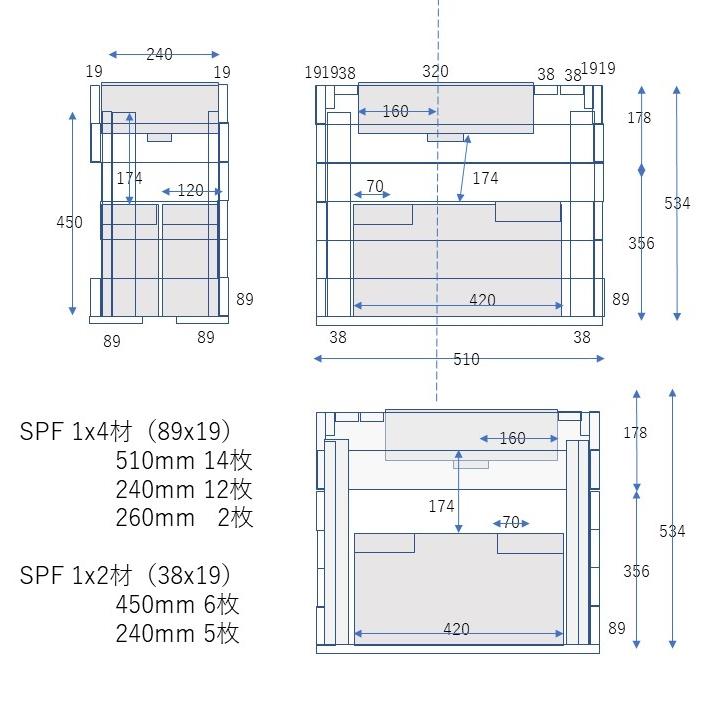
設計図はこちら。(クリックすると拡大)ほぼ当初の設計図どおりの寸法には納まったものの、途中で構造変更を入れた関係で木材の使用枚数や使用箇所は記載の通りとはなっていない。
The design sketch. (Click to enlarge)It ended up close, but not exactly since some tweaking was done as the build was in progress.
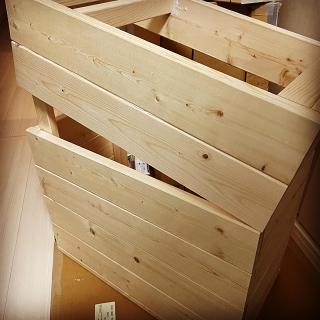
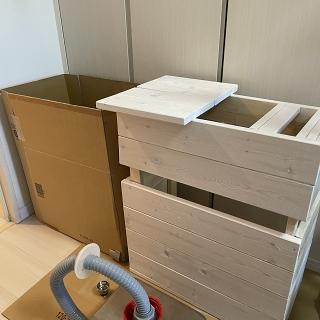
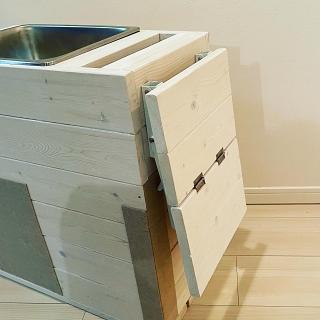
上下のフレームを作成。分割式にするのはポリタンクの取り出しの為のほかに、下フレームの有効利用の為。
Putting together the upper and lower frame independently. Making the upper frame detachable is for efficient use of the lower frame for other purposes, as well as for easy access to the water tanks.
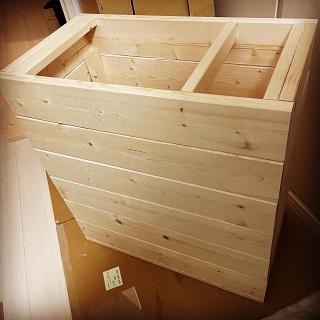
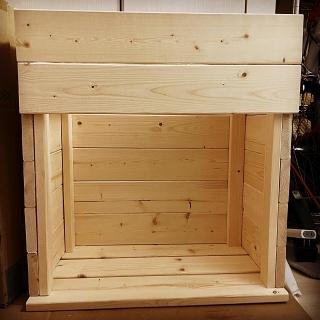
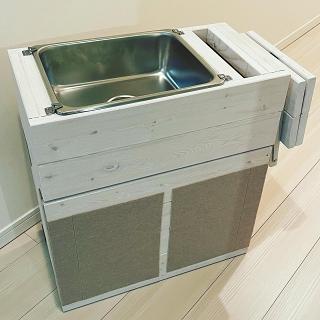
基本フレームが完成。前面は覆い、下フレームは背面を開口させることにした。
メンテナンス性を考慮するのと同時にこれまた下フレームの有効利用の為。
メンテナンス性を考慮するのと同時にこれまた下フレームの有効利用の為。
The main frame structure completed. The front side is covered whereas the rear side is left open not only for easy maintenance but for another purpose.
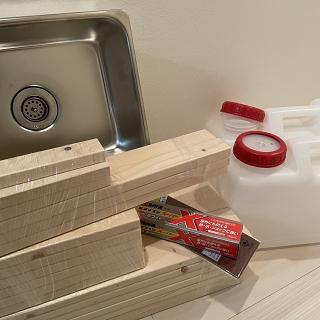
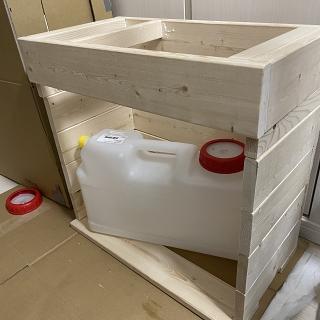
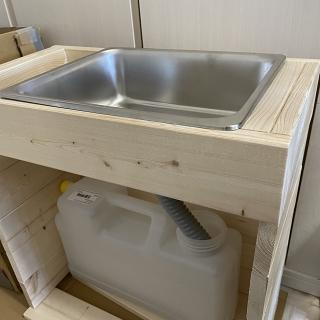
シンクとポリタンクを仮フィッティング。ほぼ想定通り。
実物の作成開始前にはサイズ感を実感すべく段ボールでモックを作成していたが、それもこの時点でお役御免。
実物の作成開始前にはサイズ感を実感すべく段ボールでモックを作成していたが、それもこの時点でお役御免。
Test fitting the sink and water tank went well as designed.
A cardboard mock up was made beforehand to get an idea of the size, but it's role ends at this point.
A cardboard mock up was made beforehand to get an idea of the size, but it's role ends at this point.
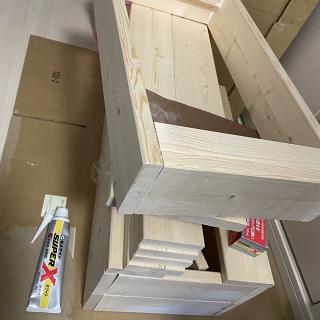
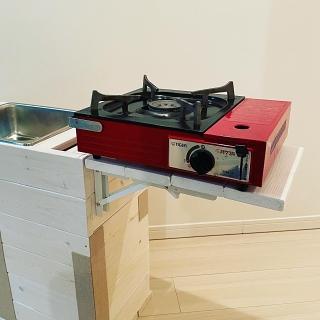
シンクを上フレームに固定したのちに、USB給水機が到着するまでの時間を使いプラスアルファの機能を追加。
切り出した木材の余りを組み合わせて折りたたみ式のテーブルをサイドに付け足してみた。携帯性を考慮してテーブルサイズを決めたわりにはカセットコンロが載る面積は確保できて、それなりに使い物にはなりそうだ。
切り出した木材の余りを組み合わせて折りたたみ式のテーブルをサイドに付け足してみた。携帯性を考慮してテーブルサイズを決めたわりにはカセットコンロが載る面積は確保できて、それなりに使い物にはなりそうだ。
After securing the sink to the frame, an extra feature added on while waiting for the USB charged water pump.
A foldable table is added on to the side using leftover material. The table size was designed to keep the unit easy to carry, but luckily resulted in enough size to place a cassette burner.
A foldable table is added on to the side using leftover material. The table size was designed to keep the unit easy to carry, but luckily resulted in enough size to place a cassette burner.
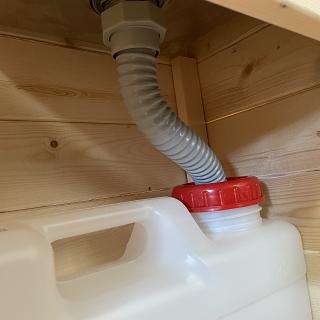
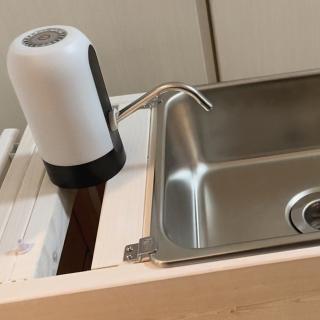
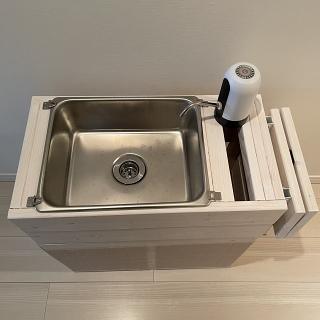
遅れて届いたUSB充電式給水機は着荷不良で最初は動かず焦ったが、分解組み直しして無事に動作させた。
早速給水させてシンクの水漏れと合わせて全体動作に問題ないことを確認。
給水機の固定方法は(固定するかどうかも含めて)思案中であるが、一旦は完成とする。
早速給水させてシンクの水漏れと合わせて全体動作に問題ないことを確認。
給水機の固定方法は(固定するかどうかも含めて)思案中であるが、一旦は完成とする。
The water pump arrived dead on arrival, and needed a disassembly to get it working.
Once it was sucking up water, the water system was checked for leaks and to see if the pump had enough power.
It succeeded, and the unit is complete.
Once it was sucking up water, the water system was checked for leaks and to see if the pump had enough power.
It succeeded, and the unit is complete.
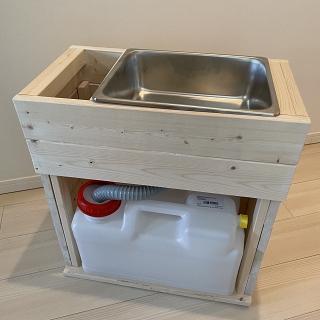
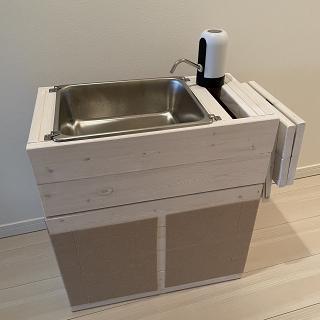
テーブル付きポータブル給水シンク(ポータブル小型ギャレー)の全容。キャンピングカーとしては小型な部類になる我が日産NV200キャンパーにマッチし、かつ必要に応じてな簡単に搭載、積み下ろしできるサイズに仕上げた。一方最低限の実用性も考えてシンクの大きさはギリギリ攻めた。給排水の容量もオーバースペックと思いつつ給水排水各10Lのタンクとした。給水側は5Lにしてもいいかもしれない。
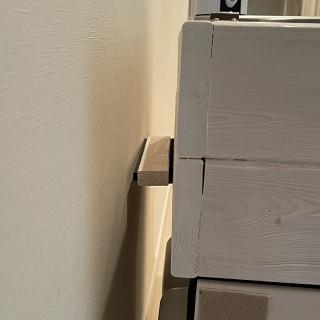
車両の内装壁面に納まりよく搭載できるよう寸法出しを行い追加部品を追加して、いよいよ車載合わせ込みである。
車両の内装壁面に納まりよく搭載できるよう寸法出しを行い追加部品を追加して、いよいよ車載合わせ込みである。
The whole picture of the portable galley (water sink). The size was designed to fit my Nissan NV200 camper which is a rather small camping car, as well as with the mind for easy loading/unloading. On the other hand, the size of the sink needed to be practical at the same time. Water capacity is 10L each for supply and waste which is a bit over spec. I might get a smaller supply tank of 5L instead.
Time for fitting the unit in to the NV200 after adding few parts to help a snug fit with the interior.
Time for fitting the unit in to the NV200 after adding few parts to help a snug fit with the interior.


コメントする